

1
Start with a preset
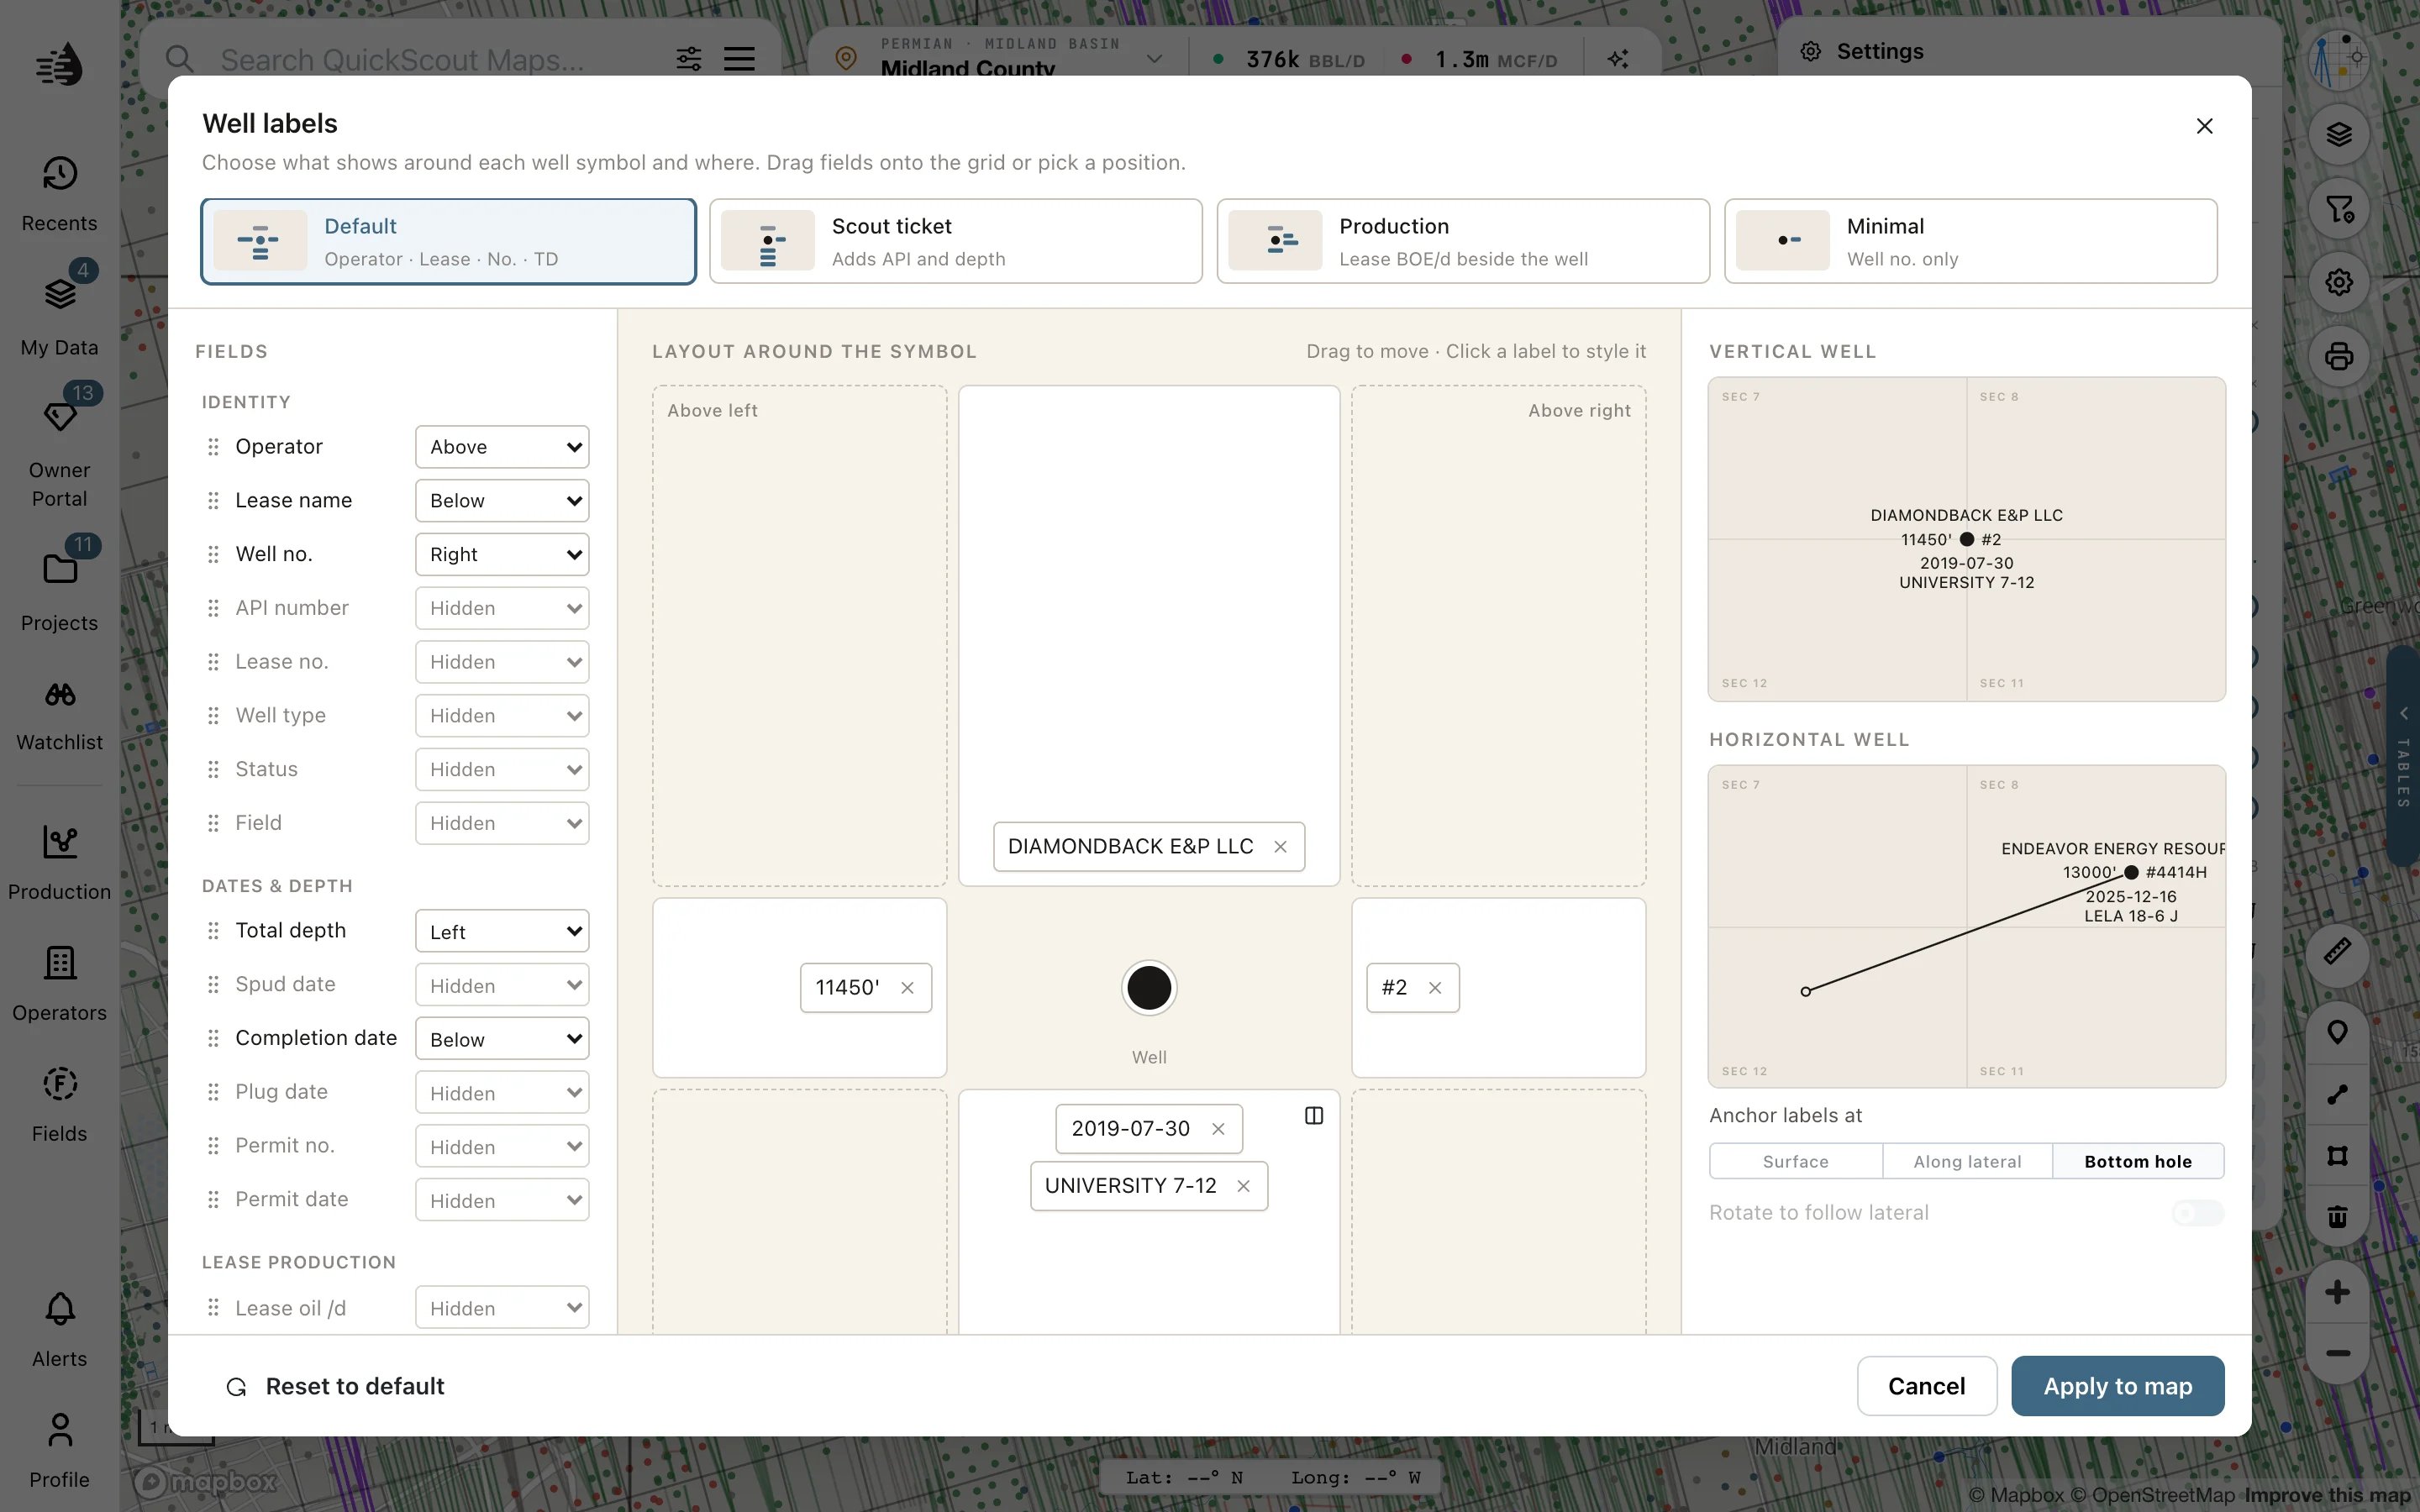
Choose Default, Scout ticket, Production or Minimal, or work from your current layout.
2
Place the fields
Drag a field onto a position around the well symbol, or choose its position from the field’s menu. Multiple fields can share a position. Reorder them there, or use the position’s inline option to put them on one line.Use a label’s × to remove it. You can also choose Hidden in its position menu.
3
Style and apply
Select a placed label to change its Size, Weight or Case. Text size changes the overall size; Halo behind text improves contrast with the basemap.Check the vertical and horizontal previews, then click Apply to map. Closing the editor without applying leaves the map’s labels as they were.
What can a label show?
Fields include operator, lease, well number, API, field, well type and status; total depth and drilling dates; permit information; and lease oil, gas or BOE per day.Lease production is not per-well production. It is the lease’s latest-month daily rate. The RRC reports oil by lease, so every well on that lease shows the same figure.