> ## Documentation Index
> Fetch the complete documentation index at: https://docs.quickscout.io/llms.txt
> Use this file to discover all available pages before exploring further.
# Print and save a map
> Make a scaled map sheet with labels and notes, then export PDF, PNG or GeoTIFF.
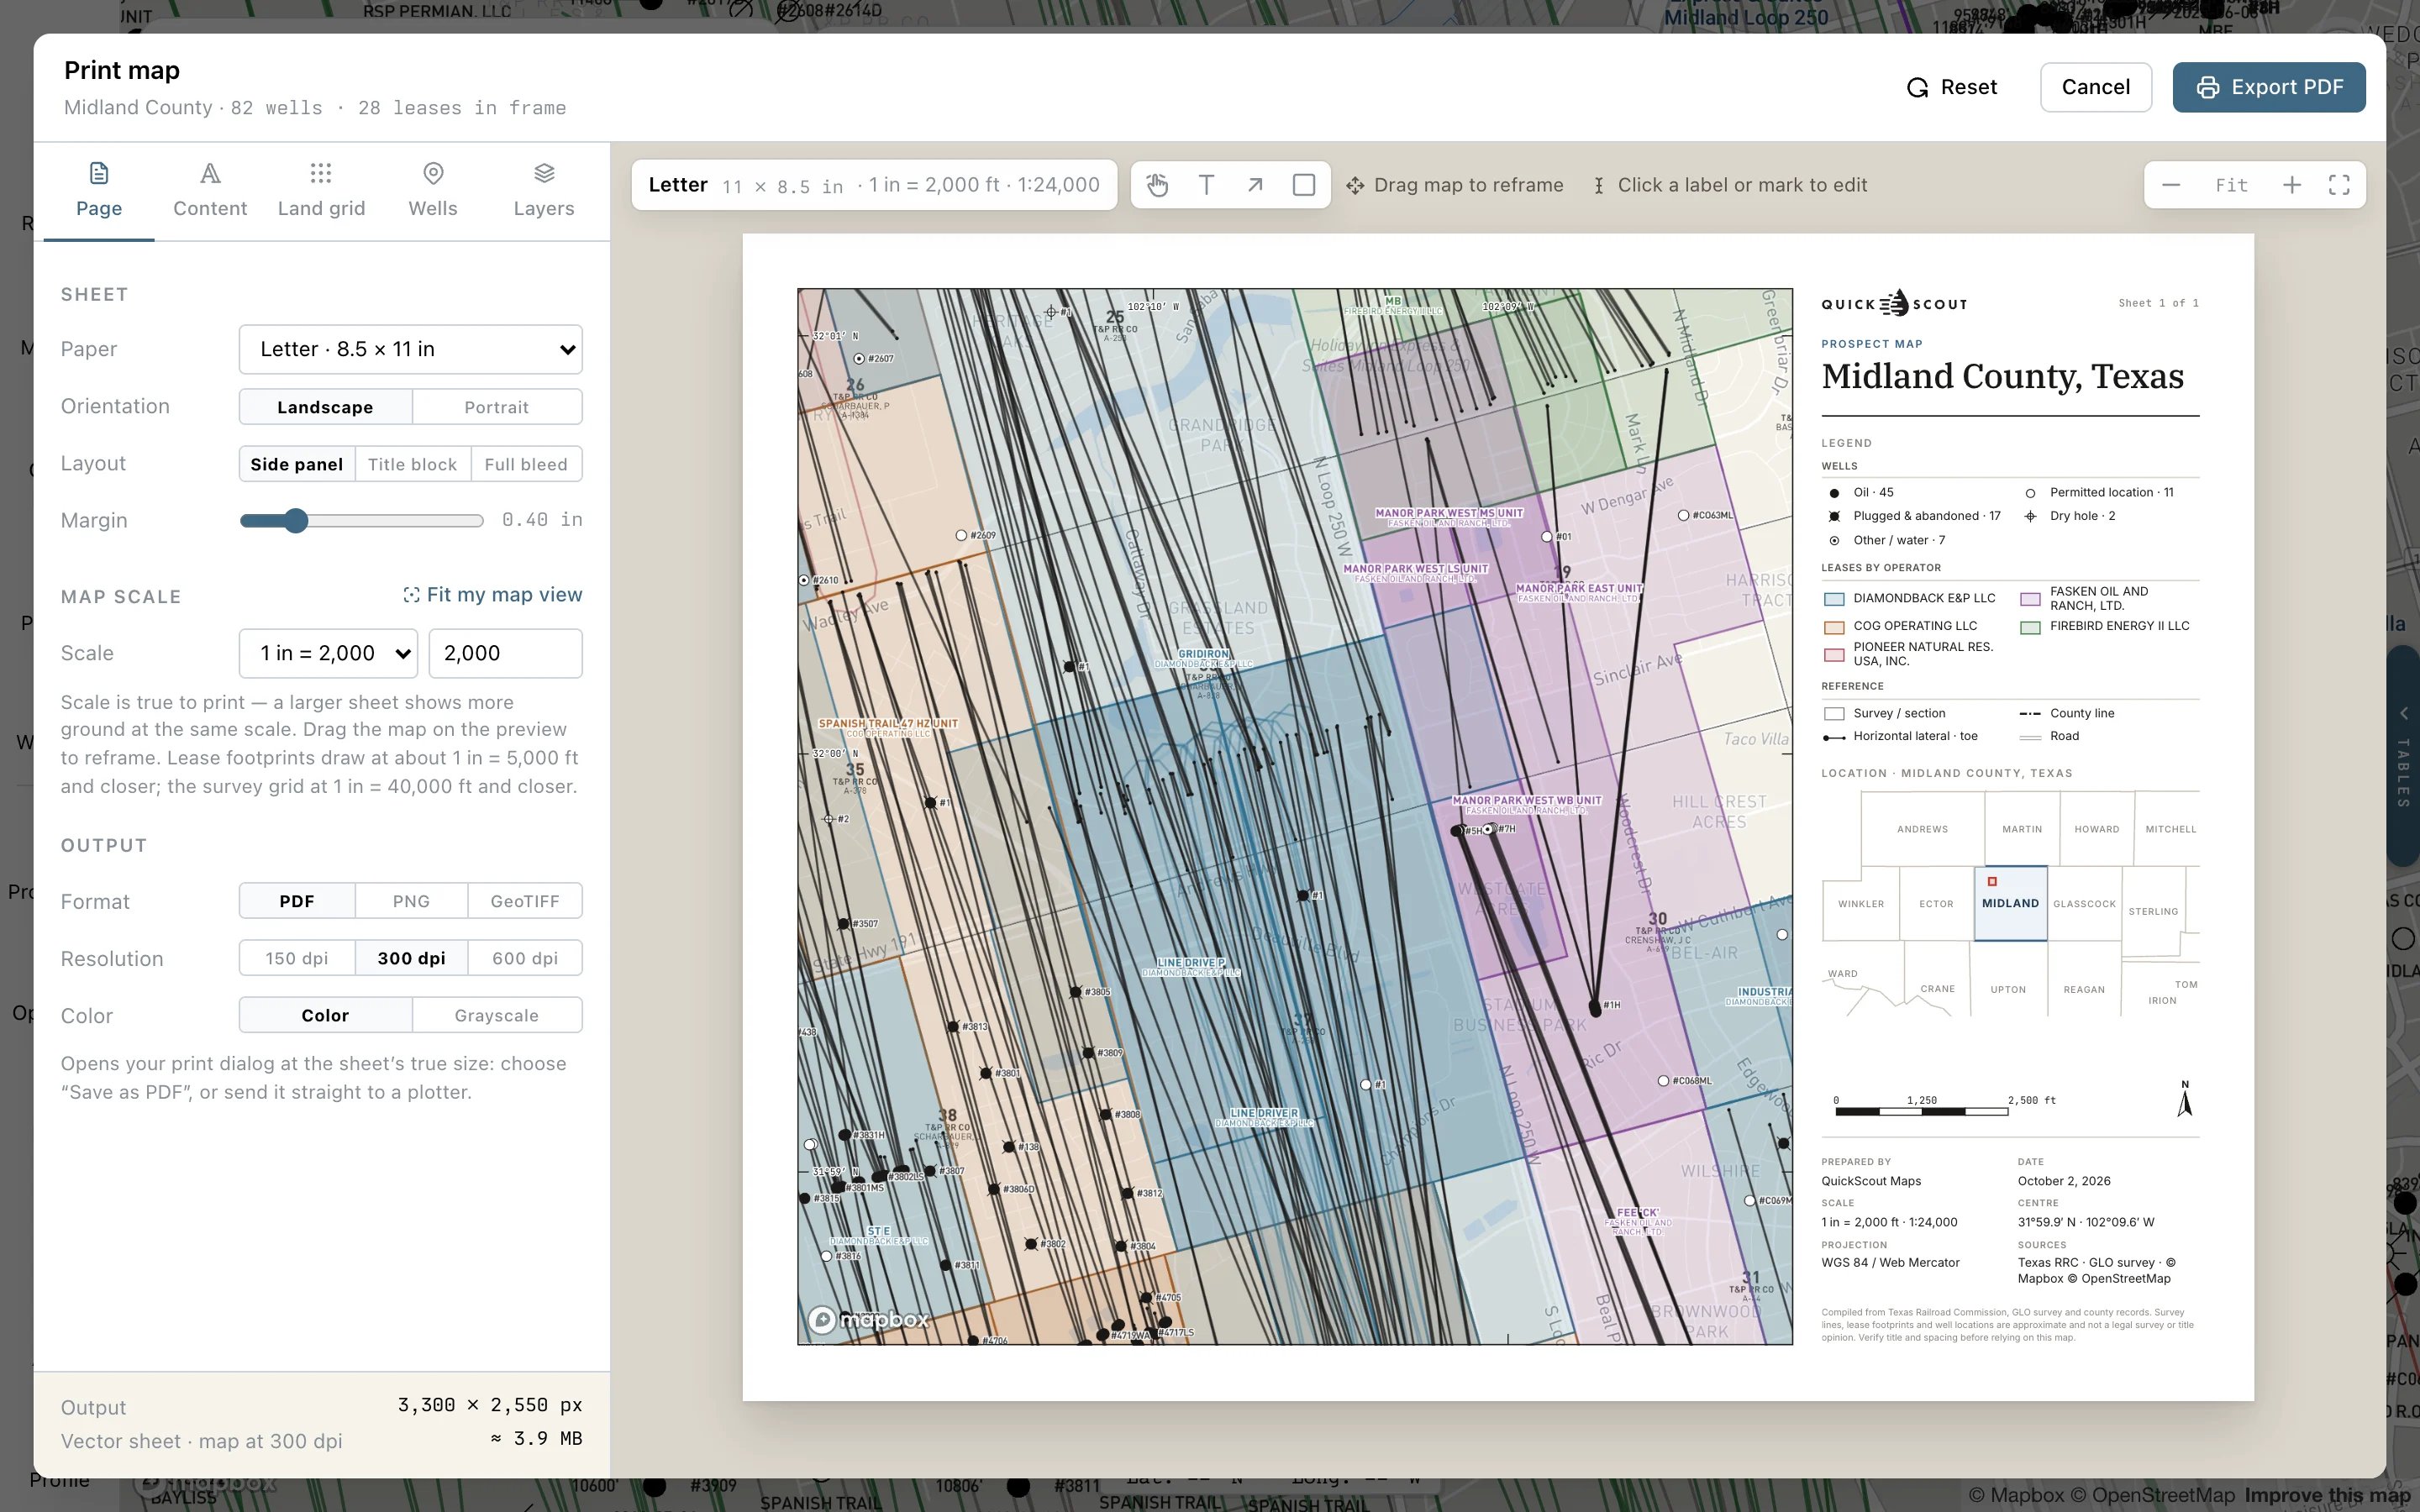
Frame the area you want in Maps, then click **Print map** (the printer on the right rail). Map Print Studio opens a sheet preview centered on that view.
On **Page**, choose **Paper**, **Orientation** and **Layout**: **Side panel**, **Title block** or **Full bleed**. Set the **Scale**, then drag the map on the preview to frame your area.
Scale is feet on the ground per inch on paper. A larger sheet shows more ground at the same scale. **Fit sheet** changes the preview size on screen; it doesn't change the printed scale.
Use **Content** for the title, subtitle, credits, notes and map elements. **Land grid** controls survey lines and section labels. **Wells** controls well statuses, symbols and labels. **Layers** chooses the basemap and reference layers.
Check the preview: the print has its own layer and label settings. Don't assume every overlay on the live map is included.
On **Page**, pick **Format**, **Resolution** (150, 300 or 600 dpi), and **Color** or **Grayscale**. Click **Export PDF**, **Export PNG** or **Export GeoTIFF** at the top.
 ## Choose the format
| Format | Includes | Use it for |
| - | - | - |
| **PDF** | The sheet, title block and marks | Printing or sharing a finished map. The browser opens its print dialog; choose **Save as PDF** or your printer. |
| **PNG** | The whole sheet, including your marks | A presentation or image attachment. |
| **GeoTIFF** | The map frame only, georeferenced in EPSG:3857 | Loading the map into a GIS. The title block and annotation marks are left out. |
For a scaled PDF or paper copy, use the chosen paper size and print at **Actual size / 100%**. **Fit to page** changes the scale.
## Add notes and edit labels
Above the sheet, choose **Text** and click to place a note, or choose **Arrow** or **Box** and drag. The tool returns to pan after you place the mark.
* Drag a mark to move it. Its handles move individual ends or corners.
* Click a mark to change its text or size, or delete it. Delete or Backspace removes a selected mark.
* Click a section, lease or well label to edit or hide its text for this print. Use **Revert** to undo an individual label edit.
Marks stay attached to their map locations when you reframe or change scale. Label edits affect the print, not the source records.
## Missing labels?
Section labels show **prints at … or closer** when the chosen scale is too broad. Choose a closer scale or reduce label size. **Print them anyway** overrides the section-label fit rule.
Well labels are held back when the sheet is too crowded; the **Wells** tab explains why. Reframe a smaller area or use a closer scale. Even when labels are enabled, overlapping labels may give way to each other.
Your sheet settings are remembered for your account and project. Each time you open Print Studio, its map starts from your current Maps view.
This documentation is built and hosted on [Mintlify](https://mintlify.com), a developer documentation platform.
## Choose the format
| Format | Includes | Use it for |
| - | - | - |
| **PDF** | The sheet, title block and marks | Printing or sharing a finished map. The browser opens its print dialog; choose **Save as PDF** or your printer. |
| **PNG** | The whole sheet, including your marks | A presentation or image attachment. |
| **GeoTIFF** | The map frame only, georeferenced in EPSG:3857 | Loading the map into a GIS. The title block and annotation marks are left out. |
For a scaled PDF or paper copy, use the chosen paper size and print at **Actual size / 100%**. **Fit to page** changes the scale.
## Add notes and edit labels
Above the sheet, choose **Text** and click to place a note, or choose **Arrow** or **Box** and drag. The tool returns to pan after you place the mark.
* Drag a mark to move it. Its handles move individual ends or corners.
* Click a mark to change its text or size, or delete it. Delete or Backspace removes a selected mark.
* Click a section, lease or well label to edit or hide its text for this print. Use **Revert** to undo an individual label edit.
Marks stay attached to their map locations when you reframe or change scale. Label edits affect the print, not the source records.
## Missing labels?
Section labels show **prints at … or closer** when the chosen scale is too broad. Choose a closer scale or reduce label size. **Print them anyway** overrides the section-label fit rule.
Well labels are held back when the sheet is too crowded; the **Wells** tab explains why. Reframe a smaller area or use a closer scale. Even when labels are enabled, overlapping labels may give way to each other.
Your sheet settings are remembered for your account and project. Each time you open Print Studio, its map starts from your current Maps view.
This documentation is built and hosted on [Mintlify](https://mintlify.com), a developer documentation platform.